History of Photography
| A ‘camera obscura’ is described to be an optical device used to form images on walls in a dark room using a pinhole. This was the beginnings of photography and there is no creation date recorded for this device. It was enhanced in the 1500s by enlarging the hole with a telescope lens which improved brightness and clarity. The discovery of creating physical photographs began in the early 1800’s. The theory that was applied was the observation that different substances when exposed to light can become visually altered. Thomas Wedgwood created the first reliably documented photograph however this resulted in failure. Nicéphore Níecpe was the first person to have documented success although his results were poor. Nicéphore’s legacy continued from there by being the creator to the worlds earliest surviving camera photograph, ‘View from the Window at Le Gras (Circa* 1826). Before the creation of the physical photograph people relied on artists to paint portraits of them. This was only available to the wealthy and was favoured due to the ability to render tones, detail and perspective. Portrait miniatures was highly popular due to their effectiveness and cheaper cost. Photography became commercialised in 1839, which is associated to be the birth year of practical photography. The quality of photographs improved over time through the discovery of new photographic processes. This included the use of different materials and chemicals when developing an image. The first photographic process known to the public was called ‘Daguerreotype’ which was created by Nicéphore’s associate, Louis Daguerre. Louis used a sheet of silver plated copper and treated it with fumes from mercury vapour. The introduction of digital camera’s in the 1990’s completely revolutionised photography. | 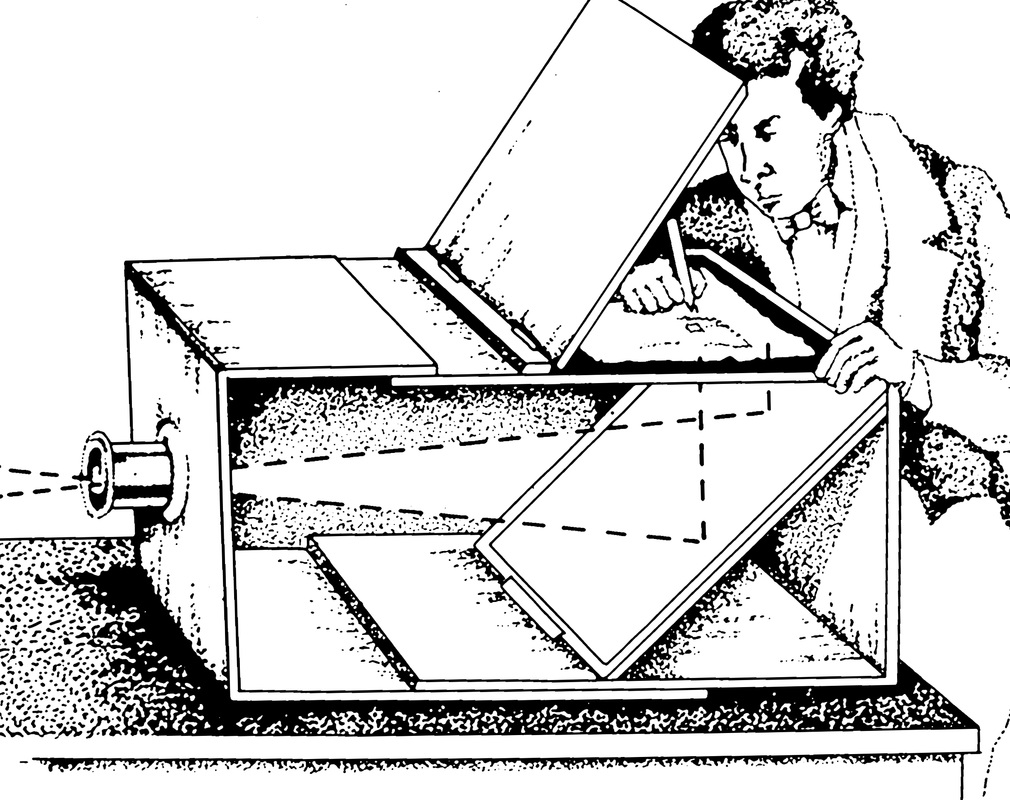 Camera Obscura 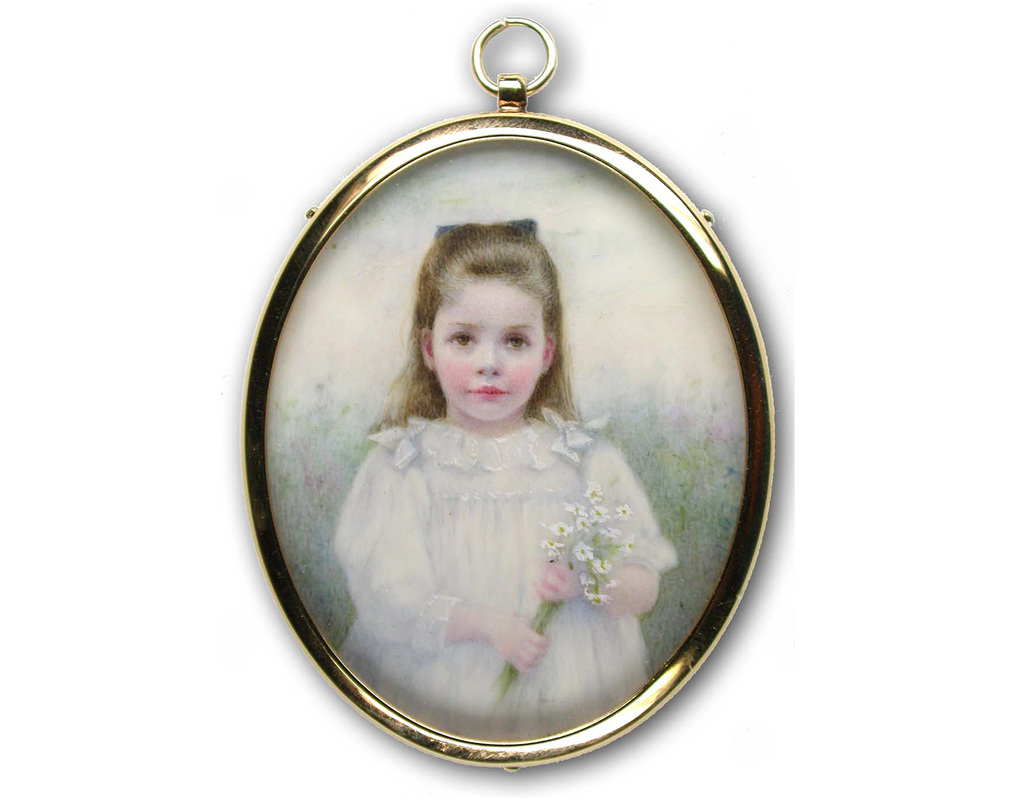 Portrait Minature  'View from the Window at Le Gras' 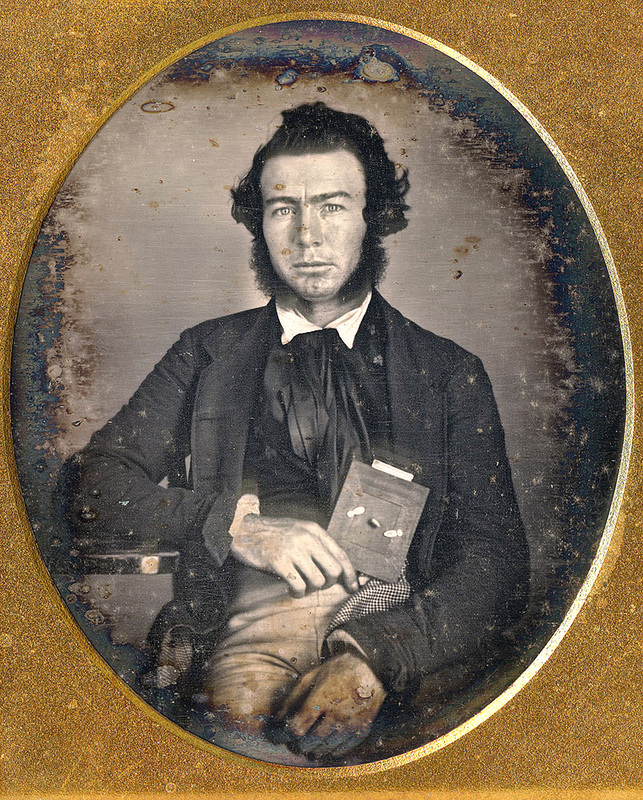 Daguerreotype Picture |
Applications of Photography
Advertising & Promotional
Advertising and promotional photography are closely linked together with an outcome of strengthening a brand and selling a product or idea. With advertising, photography plays the most important role in advertising campaigns. Promotional images are the most recognisable factors within advertising. They tend to use celebrities and models to depict their products which helps promote recognisability among consumers. Larged branded commercial companies that have an established look will supply a tight brief, which reduces the creativity of the photographer but minimises the potential risk of misdirection. Outside of commercialism, advertising and promotional photography could help promote a cause or organisation. An example of this would be the NHS's Anti-Smoking campaign; they use graphic images, usually including children, to help people realise the damage that smoking does. The context that advertising and promotional photography are found are in magazines, newspapers, billboards, posters and in-store displays.


| Evolution The evolution of advertising and promotional photography is that a lot of the old ads were hand drawn illustrations that would be pressed to produce copies. This has progressed to using digital graphics and photography images. |


Fashion:
Fashion photography is a genre of photography that has the intention of showcasing clothes in a captivating way. The picture style often varies but it normally goes between studio backdrops to grand sets or locations. The photos are often said to be thought provoking and creative. They can express a story, season, brand, influences or the designer. The context you would find fashion photography would be in fashion magazines such as Vogue, Elle, Vanity Fair, etc.
Fashion photography is a genre of photography that has the intention of showcasing clothes in a captivating way. The picture style often varies but it normally goes between studio backdrops to grand sets or locations. The photos are often said to be thought provoking and creative. They can express a story, season, brand, influences or the designer. The context you would find fashion photography would be in fashion magazines such as Vogue, Elle, Vanity Fair, etc.


| Evolution: It's to my understanding that vintage fashion photography didn't venture much outside of a studio. I think modern fashion photography has made more efforts to make use of sets and locations to enhance a picture or tell a story. It's not uncommon however for fashion photography to revert back and reference photographs that have been taken in the past. The lighting style was often high frontal butterfly light which was matched the style commonly seen in films at the time, I feel like there's a lot more variation in the lighting now. With the creation of photoshop came the alteration of the photograph; skin smoothing, blemish removal, light alteration, body modification and overall enhancements are enforced in modern society. A final picture can also be stitched together from multiple to create the best possible outcome. |


Photojournalism:
Photojournalism is a way of communicating news through photographs. A photojournalist is normally associated or hired by a newspaper and will go to various locations to take pictures that will tell the story of what's happening there. Their photography as the intention of showing real life for how it really is. Local newspapers will send photojournalists to capture local interest stories while national newspapers will send them to get the pictures photojournalism is usually associated with, which is the extremities of war zones, riots and disaster zones.
Photojournalism is a way of communicating news through photographs. A photojournalist is normally associated or hired by a newspaper and will go to various locations to take pictures that will tell the story of what's happening there. Their photography as the intention of showing real life for how it really is. Local newspapers will send photojournalists to capture local interest stories while national newspapers will send them to get the pictures photojournalism is usually associated with, which is the extremities of war zones, riots and disaster zones.


| Evolution: Since photography is now digitalised, the method of delivery has changed. Delivering images can now be instantaneous instead of having to post the negatives or prints. The cameras and equipment has also improved meaning that snapshots in the middle of chaos are taken quicker and easier. |


Portraiture:
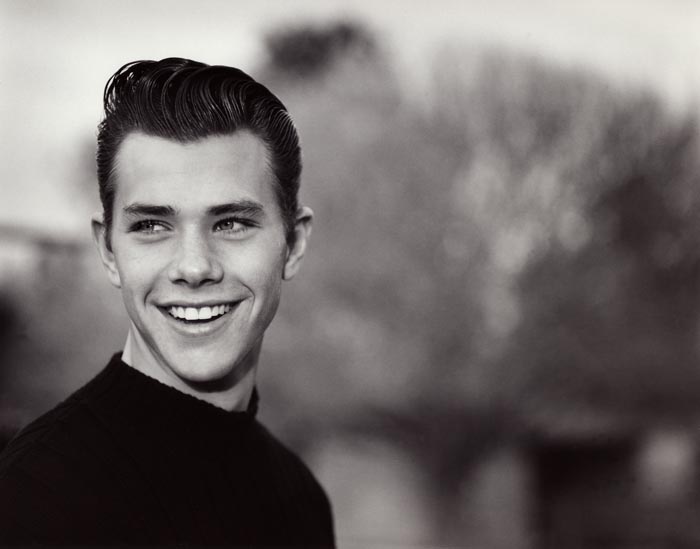
Portraiture photography is a way of producing photographs that show someone's natural character and personality. The shots are often staged and shaped by the photographer to achieve the desired result. The photographer will provide verbal cues that will direct the model to achieve the best shots from them. Unless the photoshoot is with the intention of showcasing formality, such as wedding or school photographs, the models will normally be asked to not overdress and wear more casual clothing. Studio's are often prefered for it's ability to change the lighting and look of a photography however portraiture sessions could be taken anywhere.
Portraiture photography is a way of producing photographs that show someone's natural character and personality. The shots are often staged and shaped by the photographer to achieve the desired result. The photographer will provide verbal cues that will direct the model to achieve the best shots from them. Unless the photoshoot is with the intention of showcasing formality, such as wedding or school photographs, the models will normally be asked to not overdress and wear more casual clothing. Studio's are often prefered for it's ability to change the lighting and look of a photography however portraiture sessions could be taken anywhere.


| Evolution: In classic portraitures the subjects were often rigid and formally posed. They didn't showcase any of their character or personality and their clothing was usually their best outfit. Modern portraitures are more candid, relaxed and open to creative expression. |


High Street Studio Work:
This is when a photography chain/ individual photographer sets up a photography studio in a populated area. They will advertise studio sessions at set prices with group sessions having reduced deals. Their biggest draw for customers would be families looking to get group pictures and individual portraits of their children.
This is when a photography chain/ individual photographer sets up a photography studio in a populated area. They will advertise studio sessions at set prices with group sessions having reduced deals. Their biggest draw for customers would be families looking to get group pictures and individual portraits of their children.


Architectural:
Architectural photography is the photographing of buildings and structures. It's a way of taking the mundane and everyday that people pass every day and showing them in a compelling and isolated way. Light, composition and perspective is the main attributes used to create unique viewpoints. These photographs are primarily used for print, promotional related media within businesses and tourism.
Architectural photography is the photographing of buildings and structures. It's a way of taking the mundane and everyday that people pass every day and showing them in a compelling and isolated way. Light, composition and perspective is the main attributes used to create unique viewpoints. These photographs are primarily used for print, promotional related media within businesses and tourism.


| Evolution: The evolution of architectural photography comes in the form of the buildings and structures themselves. Modern architecture is made with more thought towards the design, shape, aesthetic look and it's purpose.
|

Medical:
Medical photography involves the documentation of patients and surgical proceeders for the sake of record and comparison. These shots are detailed and provide an accurate record in the assistance of a diagnosis. Consent must always be given when taking medical photographs. If the patients agree to it these images can also go towards education and public publication.
Medical photography involves the documentation of patients and surgical proceeders for the sake of record and comparison. These shots are detailed and provide an accurate record in the assistance of a diagnosis. Consent must always be given when taking medical photographs. If the patients agree to it these images can also go towards education and public publication.


Illustration:
Illustrative photography is the way of using photographs to tell a story or action. It's a function photos generally fulfil better than alternative illustrative methods, such as drawings or paintings. The context that you would find this would be advertisements, public service and health notices and online.
Illustrative photography is the way of using photographs to tell a story or action. It's a function photos generally fulfil better than alternative illustrative methods, such as drawings or paintings. The context that you would find this would be advertisements, public service and health notices and online.
 |
Documentary:
Documentary photography is taking photographs of a subject over a period of time or with a greater purpose, captures a moment of reality in order to tell a story of what's really happening in the world. Terry Richardson is a famous documentary photographer. He travels all across the world and photographs various buildings, structures, people and objects. A notable piece of his work was his collaboration with Lady Gaga where he photographed her over a 10 month period during the peak of her career. These photo's included many behind the scenes from big moments of her career and personal photographs. It's reported that more than 100,000 pictures were taken during the time period and only 360 made it to the book, Lady Gaga x Terry Richardson.
Documentary photography is taking photographs of a subject over a period of time or with a greater purpose, captures a moment of reality in order to tell a story of what's really happening in the world. Terry Richardson is a famous documentary photographer. He travels all across the world and photographs various buildings, structures, people and objects. A notable piece of his work was his collaboration with Lady Gaga where he photographed her over a 10 month period during the peak of her career. These photo's included many behind the scenes from big moments of her career and personal photographs. It's reported that more than 100,000 pictures were taken during the time period and only 360 made it to the book, Lady Gaga x Terry Richardson.


Photographic Equipment:
Compact/ Point & Shoot Camera:
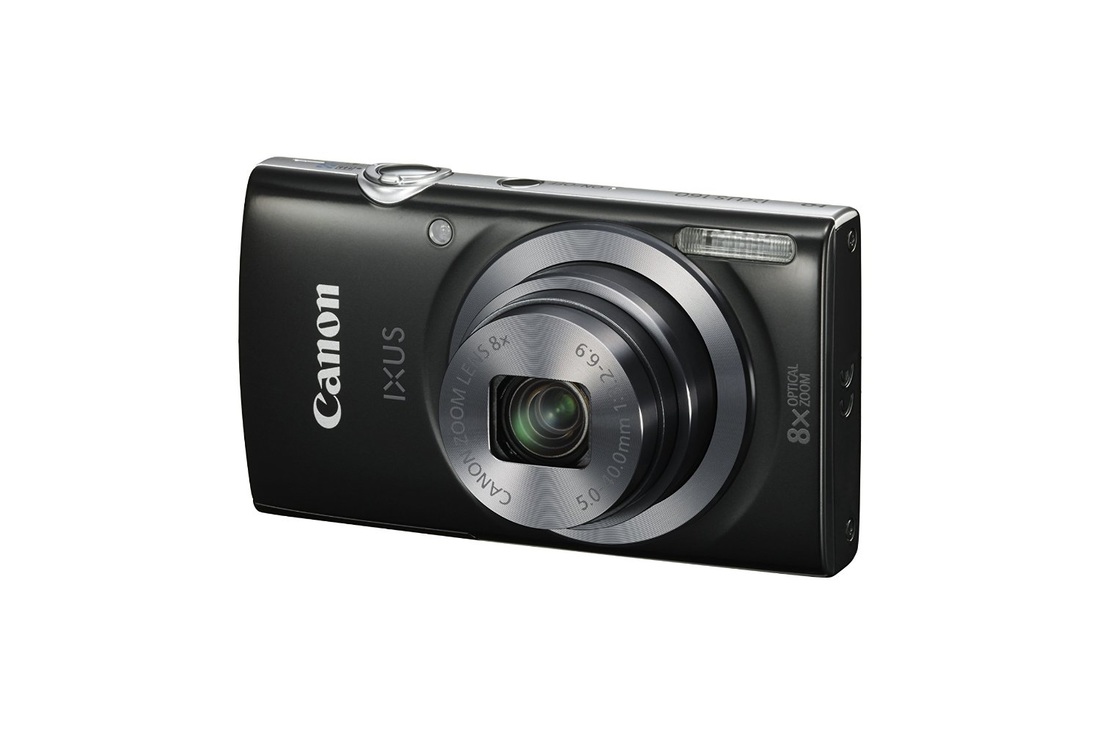
Compact cameras, otherwise known as point and shoot cameras are marketed towards the average consumer. They tend to be small in size, lightweight, easy to use and the cheapest option. They have the least amount of modes and tend to not have much flexibility in terms of manually controlling the settings. They're preferable for most people as they don't require much knowledge or practice to use it. The Canon IXUS 180 doesn't boast to have an extensive amount of features but for it's price it's not to be expected. Quality should be decent but consumers may run into the problem of experiencing poor results at times as it seems to heavily rely on it's automatic mode.
Example: Canon IXUS 180 - https://www.amazon.co.uk/Canon-Point-Shoot-Digital-Camera/dp/B00RTGJZ0E
- Hassle-free results with a pocketable IXUS
- 16x closer without losing quality
- Experience high results with point and shoot simplicity using Smart Auto
- Easy HD movies (720p) at the touch of a button
 |
Advanced Digital Camera:
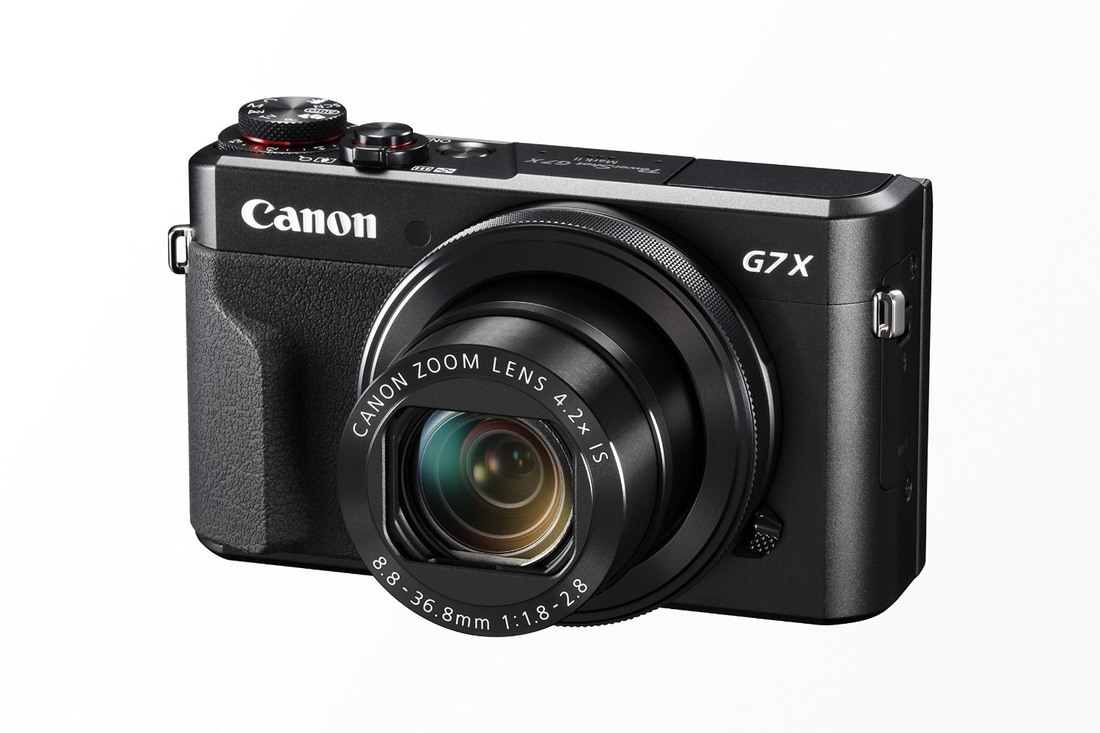
These cameras are marketed towards those who see photography as a hobby and those who regularly post digital content online. The G7X Mark II predecessor, the G7X, was highly popular among YouTubers and daily bloggers for capturing their daily lives. The Mark II was created to help fix some of the criticism that the G7X received such as; slow operation, inaccurate focus and washed out subjects. It's meant to offer you the quality of a DSLR camera in more portable form. This makes it a popular choice among those who which to capture everyday life in high quality without the bulk of a DSLR. It's top of the market for it's quality, large sensor, image stabilisation, accuracy of subjects, adaption to all lighting situations, multiple picture modes and portability.
Example: Canon PowerShot G7x Mark II
https://www.amazon.co.uk/Canon-PowerShot-G7-Mark-II/dp/B01C2QISBC
- A powerful pocket-sized camera with a bright lens, large sensor and DIGIC 7 to capture expert quality photos and movies with ease
- Shoot and share stunning Full HD 60p movies with creative control, Touch AF for cinematic focus pulls and 5-axis Dynamic IS
- Easily connect to your smart device, shoot remotely, then share or back up your creations using Wi-Fi* with NFC and Image Sync
- Enjoy simple creative control with a Lens Control Ring, intuitive touchscreen operation, 14-bit RAW and Picture Styles
- Expand your creativity with a 9 blade aperture, superfast AF, 8 fps burst even in RAW and in-camera Time-Lapse movie
 |
Bridge Digital Camera (SLR)
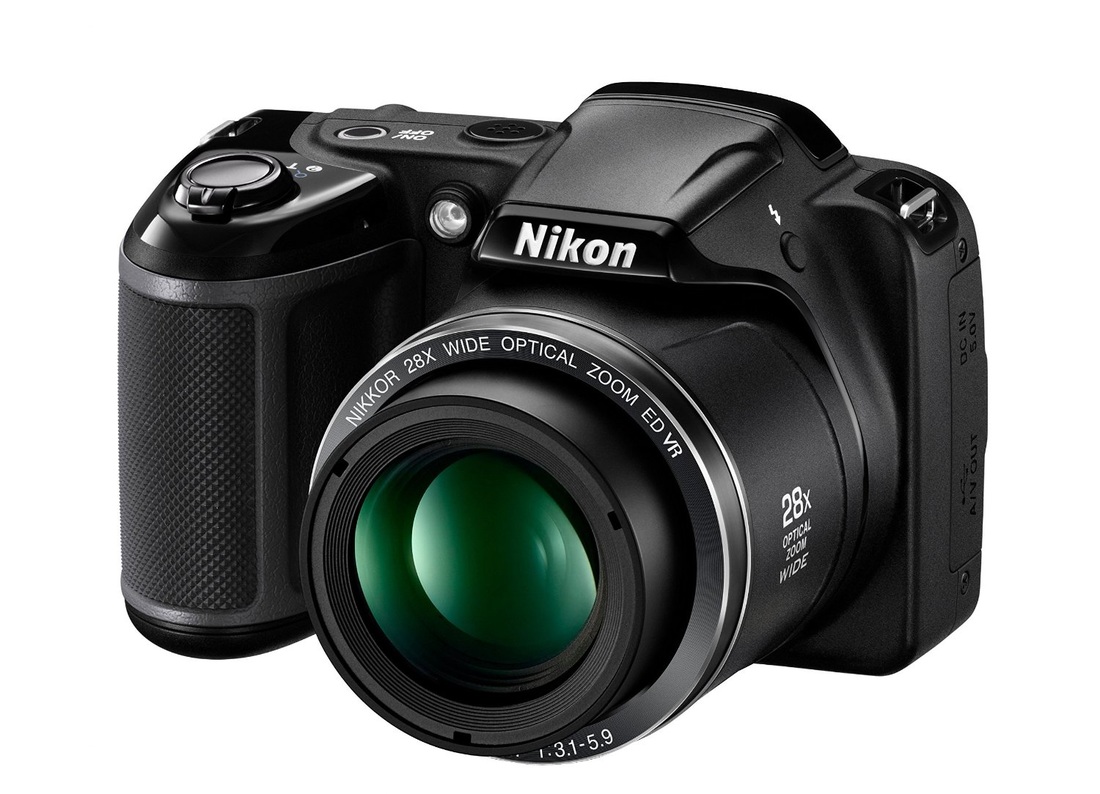
Bridge camera's are a hybrid of a digital camera and DSLRs; they have the appearance of a DSLR but tend to operate more like a digital camera. It's technology provides better image quality than your usual digital camera even though the sensor is just as small. It has a undetachable lens with a huge 'super zoom' which provides consumers a lot of flexibility within the one lens. They're marketed for people who dislike the limitations of a compact camera but still want it's simplicity of operation.
Example: Nikon Coolpix L340
https://www.amazon.co.uk/Nikon-Coolpix-L340-Bridge-Camera/dp/B00THKEKEQ
Example: Nikon Coolpix L340
https://www.amazon.co.uk/Nikon-Coolpix-L340-Bridge-Camera/dp/B00THKEKEQ
- The 20-megapixel COOLPIX L340 puts you at the heart of the action with a 28x optical zoom lens
- With Vibration Reduction, 3in LCD display and scene auto modes, it's easy to take crystal clear pictures. You can also shoot videos in HD (720p).
 |
Digital SLR (DLSR)
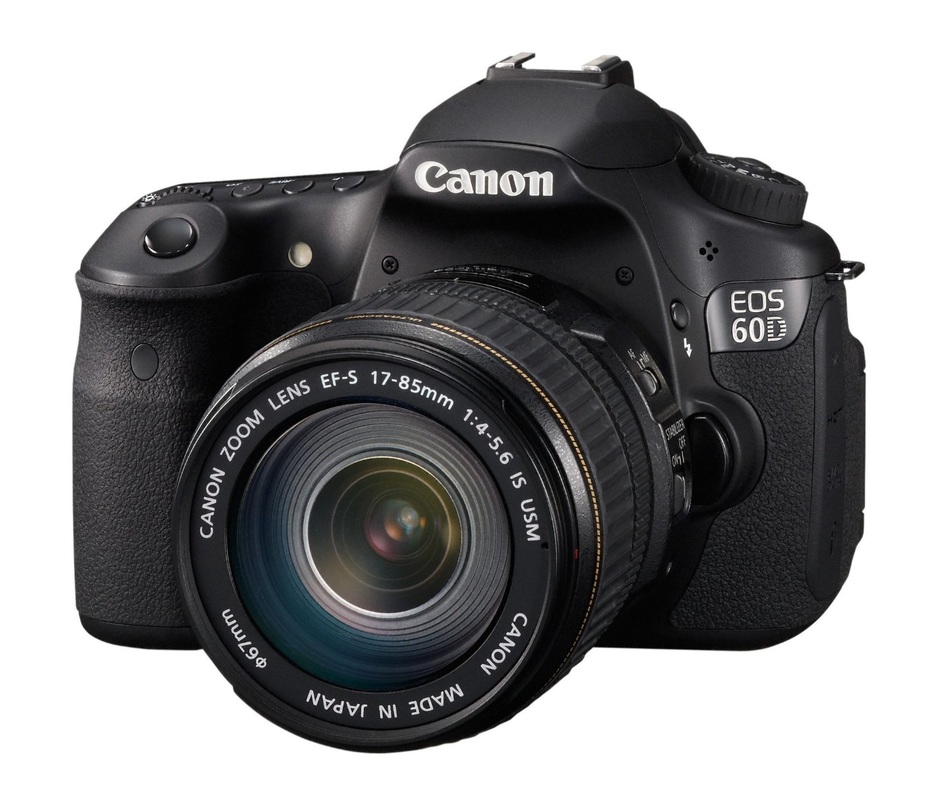
DSLR's are marketed towards the professional and upcoming photographer. These cameras offer the most flexibility and control to their consumers. It has the ability of changing the lens which is one of its main draw factors. Photographers can't use the one lens for every situation as each lens shapes and frames the picture differently. Being able to change the lens to suit the photographic situation is crucial to achieve desired results. The manual mode is often prefered but in quick situations there's a fully automatic mode and semi automatic modes.
The Canon 60D is the camera that I used throughout the assignment. It was purchased in 2012 and at the time was considered one of the best cameras on the market. It was a "mid-range" camera which I felt was worth the investment. The entry level DSLR's (T2i/ T3i) lacked some of the features I wanted and the quality was arguably not as good and the high range cameras (70D, 5D Mark II) were too expensive and had only a few differences from my camera. I'm completely self taught and went into this assignment already well experienced in using the manual mode.
Example: Canon 60D
https://www.amazon.co.uk/Canon-Digital-Camera-discontinued-manufacturer/dp/B0040X3DUW/
- 18 Megapixel APS-C CMOS sensor
- Advanced creative features with Basic+ and Creative filters
- Vari-angle 7.7 cm (3.0 inch) 3:2 ratio LCD with 1,040k dots
- Full HD movie recording with manual control and selectable frame rates
- DIGIC 4 processor for natural colour and advanced noise control
 |
Lenses:
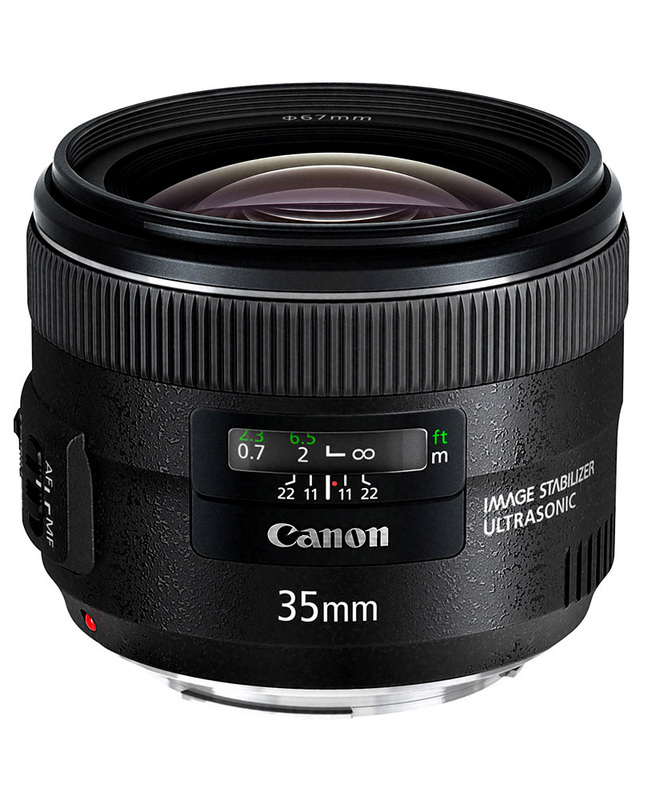
Wide-Angle - Wide angle lenses are lenses that have a short focal length. These lenses are specifically ideal for landscapes as it includes so much in the frame and has a greater depth of field meaning that a lot more in the picture will be in focused. When taking closeups using a wide angle lens the subject will dominate the foreground and distort it.
Example: Canon EF 35mm f/2
 |
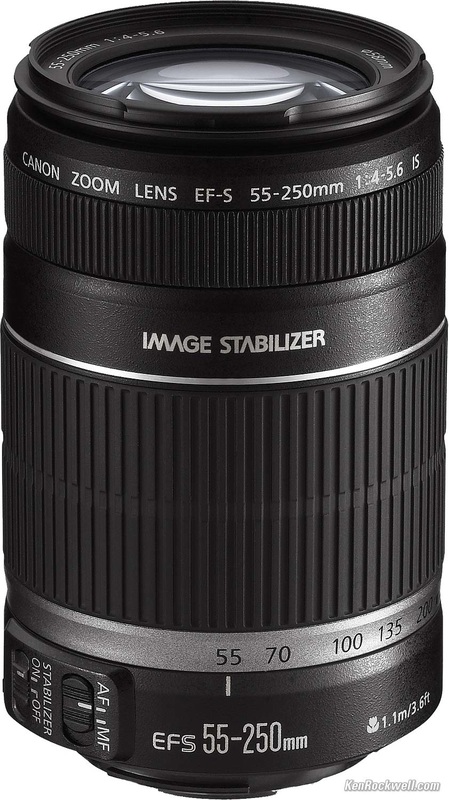
Long - Long lenses is a camera lens which has a focal length that is longer than the diagonal measure of the film. It provides great magnification to take pictures at a great distance.
Telephoto - The purpose of a telephoto is lens provide more zoom than your standard zoom lens. It enables you to get great shots from far away which suits nature and sport photography.
 |
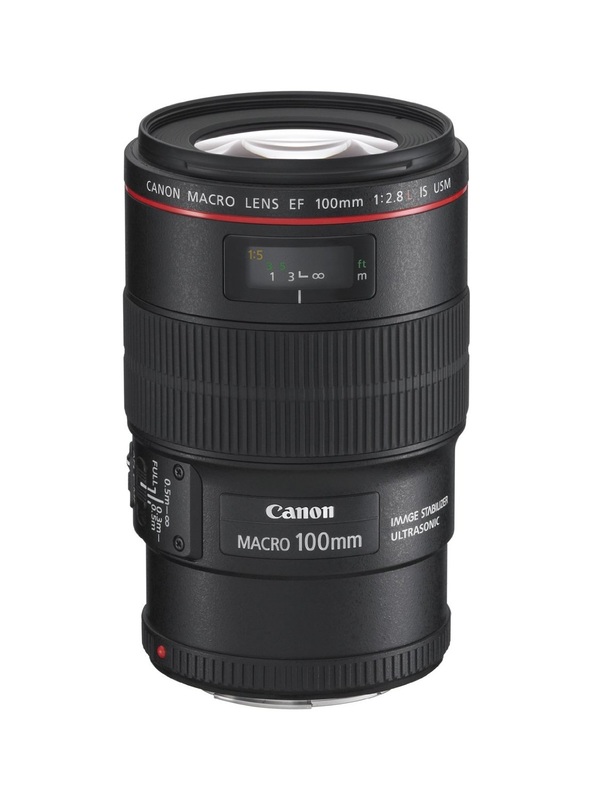
Macro - Macro lenses is easy described to be an extreme close up lens. It offers the photographer incredible detail that's not easily seen to human eye. A macro lens must have a 1:1 magnification to be considered a macro lens. The higher the focal length of the lens the more intense the depth of field is.
Example: Canon EF 100mm f/2.8L
https://www.amazon.co.uk/Canon-100mm-f2-8L-Macro-Lens/dp/B002NEFLD2
Example: Canon EF 100mm f/2.8L
https://www.amazon.co.uk/Canon-100mm-f2-8L-Macro-Lens/dp/B002NEFLD2
 |
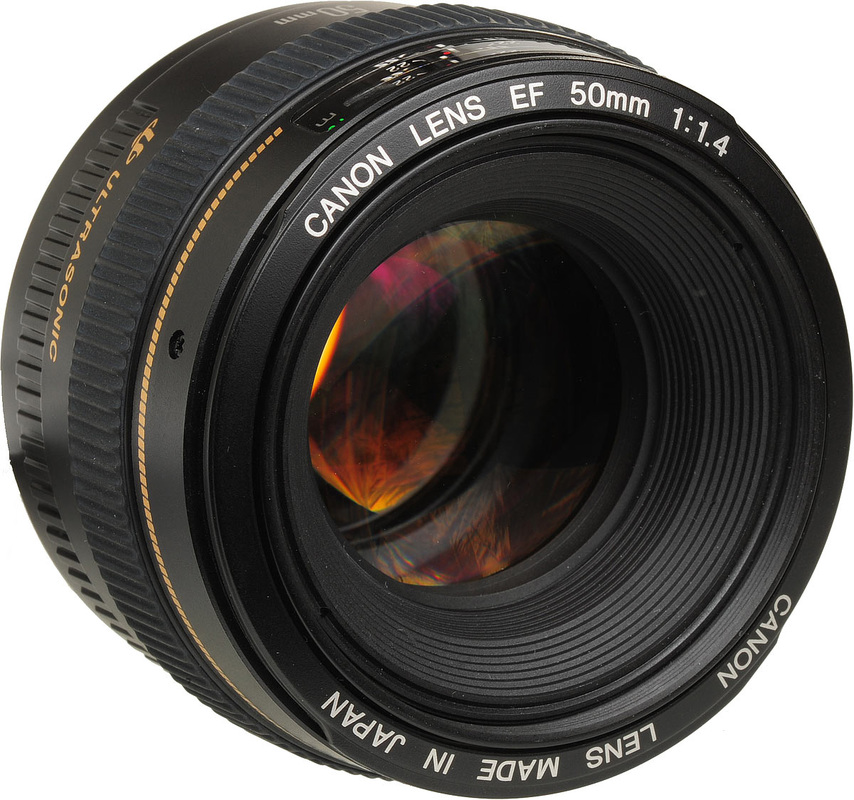
Prime - Prime lenses are fixed at a specific focal length, They don't have the ability to zoom, which requires the photographer to physically move around their subject to frame it and achieve the desired result. While it's versatility is compromised the image quality is a lot better and sharper. Distortion and vignetting are usually less noticeable and they're also much faster to work with.
I purchased this lens because it was recommended by many photographers to be a good standard lens to have in your kit. At 50mm the lens is supposed to mimic what the human eye sees, which provides the photographer with a more 'real to life' image. It's aperture of 1.4 allows more light into the lens which makes it perform well in low light situations. It works great for candid street photography, portraits and macro shots.
Example: 50mm f/1.4 Lens
https://www.amazon.co.uk/Canon-mm-f-1-4-USM-Lens/dp/B00009XVCZ
 |
Memory Cards:
Compact Flash Memory Cards:
This is a memory card that offers the consumer fast process times and high storage capacities. Camera's that accept this type of card are expensive, advanced DSLRs such as the 5D Mark III.
Compact Flash Memory Cards:
This is a memory card that offers the consumer fast process times and high storage capacities. Camera's that accept this type of card are expensive, advanced DSLRs such as the 5D Mark III.
 |
SD Memory Card:
This memory card is considered to be the standard for most types of cameras. It's wide capability extends to most laptops having an SD card reader built in, which makes accessibility easer. It's also really small and compact which is good for carrying multiple cards.
This is the memory card that my camera accepts. I have a SanDisk Extreme 16GB card and a SanDisk Ultra 32GB. I preferably use the 16GB card due to it's reliability, the 32GB has slow write speeds and can't keep up with my camera. I use it only as a backup in desperate situations.
 |
Storage:
For the storage of my pictures I used an external harddrive. An external harddrive is a portable storage system for digital files. It doesn't have the compact size of a flash drive but offers a lot more space. For the last year of college I've been using a 1TB Seagate Expansion Harddrive. I found it to be crucially important to my studies but I often had the problem of going over the file size limit. This was not a fault to the harddrive however, it was just a reflection of the many files I was working with this year.
For the storage of my pictures I used an external harddrive. An external harddrive is a portable storage system for digital files. It doesn't have the compact size of a flash drive but offers a lot more space. For the last year of college I've been using a 1TB Seagate Expansion Harddrive. I found it to be crucially important to my studies but I often had the problem of going over the file size limit. This was not a fault to the harddrive however, it was just a reflection of the many files I was working with this year.
 |
Artificial Lighting:
Flash
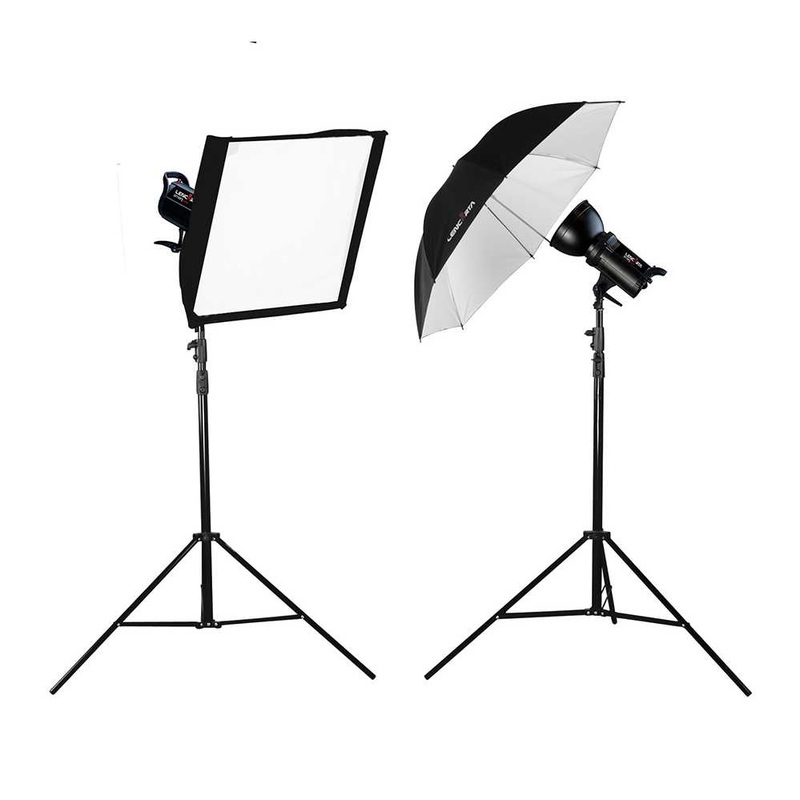
Flash is commonly used when taking headshot portraits. Harsh bright light fires out when the photograph is being taken. These flash lights are often placed on stands to position correctly to the subject and umbrella is used to soften then light and disperse it more sporadically. These cameras are remotely timed to work in sync with the shutter release button.
Flash
Flash is commonly used when taking headshot portraits. Harsh bright light fires out when the photograph is being taken. These flash lights are often placed on stands to position correctly to the subject and umbrella is used to soften then light and disperse it more sporadically. These cameras are remotely timed to work in sync with the shutter release button.
Studio Lights
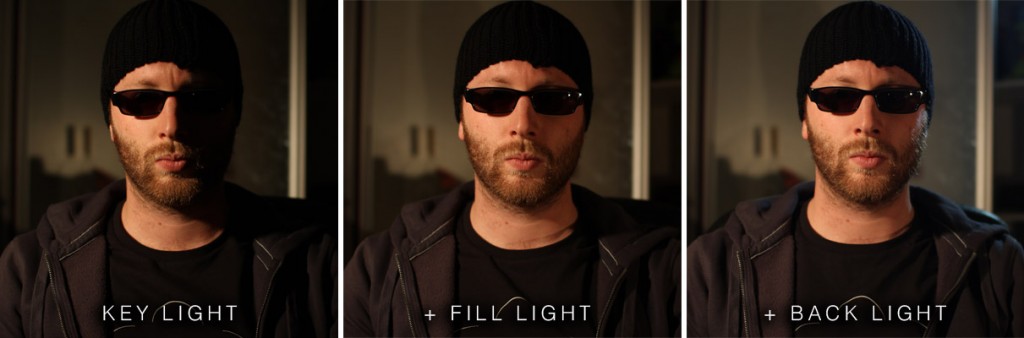
When working in a studio the most common lighting setup is the 3 point lighting technique. 3 lights are placed carefully around the subject to provide even light.
Key Light - This is the main light that is used on the subject, this could be placed left of the camera.
Fill Light - This light fills the shadows on the subject that was created from using the key light, this could be placed left of the camera.
- At this point the subject is fully lit.
Back Light - This light is used to light the backdrop and the back of the subject to make them be sharp and stand out.
Diffusers
Diffusers act to spread light evenly on a subject. This could either through the use of a softbox, which is a large panel of light that is diluted through white fabric. Or through the use of a umbrella diffuser which will provide scattered light to the subject.
Diffusers act to spread light evenly on a subject. This could either through the use of a softbox, which is a large panel of light that is diluted through white fabric. Or through the use of a umbrella diffuser which will provide scattered light to the subject.
 |
Digital Imaging:
Computer
The computers that I used over the course of this assignment was a 2015 Macbook Pro and a 2013 iMac.
I used my laptop to edit my photographs and manage my files and I used the colleges iMac computer to resize and upload my pictures to weebly.
Computer
The computers that I used over the course of this assignment was a 2015 Macbook Pro and a 2013 iMac.
I used my laptop to edit my photographs and manage my files and I used the colleges iMac computer to resize and upload my pictures to weebly.
 |  |
Software
The software I used during this assignment was Adobe Photoshop CC & Adobe Bridge CS6.
I used Camera Raw to adjust all of my pictures and I used Adobe Bridge to create the contact sheets.
The software I used during this assignment was Adobe Photoshop CC & Adobe Bridge CS6.
I used Camera Raw to adjust all of my pictures and I used Adobe Bridge to create the contact sheets.


Image Capture, Storage & Retrieval
For Image Capturing I used my built in SD Card slot on my laptop and sourced the pictures directly.
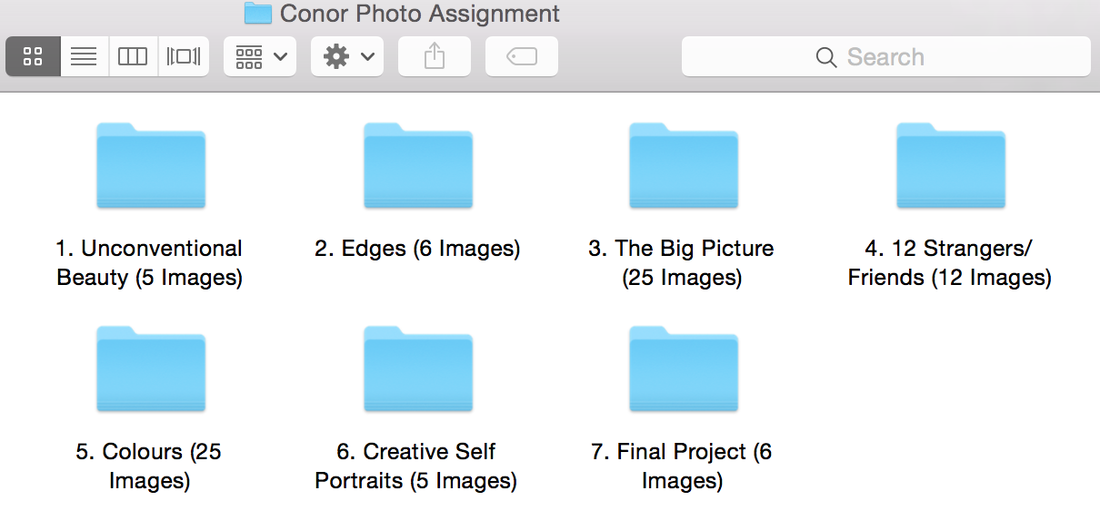
For storage I created a general folder filled with all of the pictures I took during 2016 Q1. To help me narrow down my pictures and help create an organised space I then put them in their own assignment folders as seen below, this is where I would retrieve them.
For Image Capturing I used my built in SD Card slot on my laptop and sourced the pictures directly.
For storage I created a general folder filled with all of the pictures I took during 2016 Q1. To help me narrow down my pictures and help create an organised space I then put them in their own assignment folders as seen below, this is where I would retrieve them.
 |
Printing
For printing I made use of the printer in the technician's office. We had to print our photographs as contact sheets in A3 size where applicable and hang them up in one of the media rooms.
For printing I made use of the printer in the technician's office. We had to print our photographs as contact sheets in A3 size where applicable and hang them up in one of the media rooms.


Camera Techniques:
Aperture
Aperture is the amount of light that is let into the lens.
- When the aperture is at it's lowest number (Usually f/2.8) the maximum amount of light will be let into the lens, which will make the image brighter, and there will be a shallow depth of field.
- When the aperture is at it's highest number (Usually f.22) the lowest amount of light will be let into the lens, which will make the image dark with a greater depth of field.


Shutter Speed
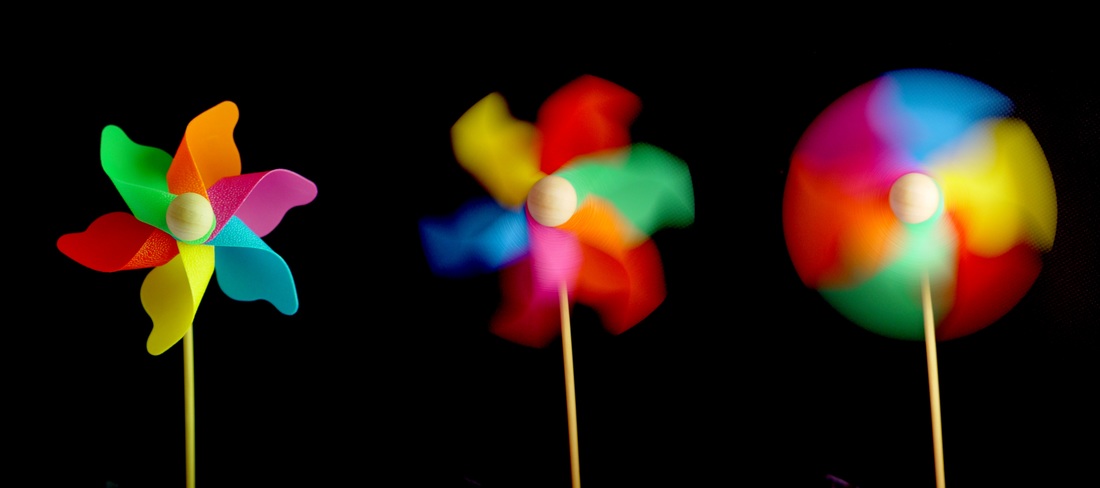
Shutter speed is the amount of time that the shutter stays open when taking a picture.
- With a fast shutter speed (1/8000) you have a better chance of capturing an individual moment (freeze action) however the image will be darker.
- With a slow shutter speed (1/100) movement will be blurred but the image will be brighter. Slow shutter speeds are not ideal for using hand held or when photographing moving subjects. To get full use of a slow shutter speed the camera should be placed on a tripod and be used on things such as objects or landscapes.
 |
ISO
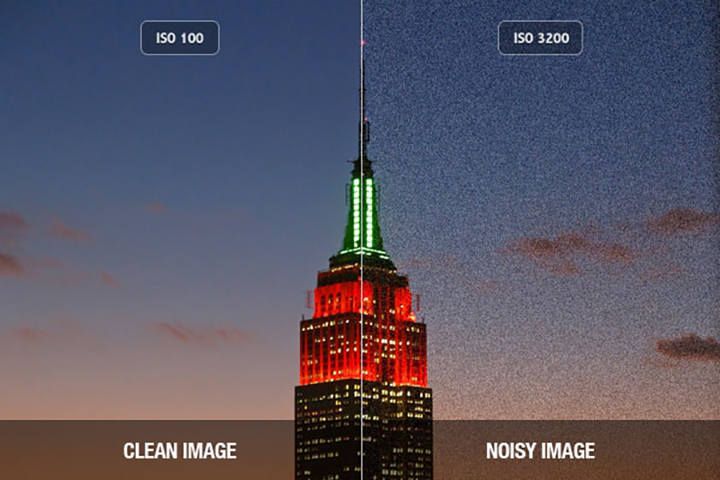
ISO is how sensitive the image sensor is to light.
- With a low ISO (100) the picture will be darker but the quality will be much cleaner.
- With a high ISO (6400) the picture will be brighter but the quality will have suffered; noise will be visible and colours will be less accurate.
ISO is how sensitive the image sensor is to light.
- With a low ISO (100) the picture will be darker but the quality will be much cleaner.
- With a high ISO (6400) the picture will be brighter but the quality will have suffered; noise will be visible and colours will be less accurate.
 |
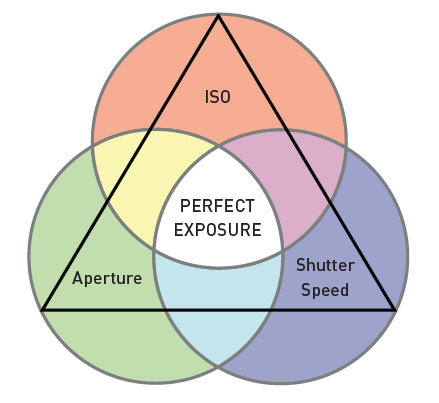
A photographer must work with Aperture, Shutter Speed and ISO to strike the perfect exposure and balance to suit the subject and setting. A photograph should never be overexposed or underexposed and different subjects require different settings. There isn't a golden 'go to' option photographers use, although some create their own preferences and limitations. Every setup is unique to the the lighting that the scene is providing and the intended outcome of the picture, which must be adjusted accordingly. For ease of understanding I found referring it to a triangle a good aid. Each corner is allocated to being either Aperture, Shutter Speed or ISO and there is a dot placed within the triangle. When one of the settings is adjusted the dot will move towards or away from this corner. For the ideal photograph the dot should end up in the center.
 |
Filters
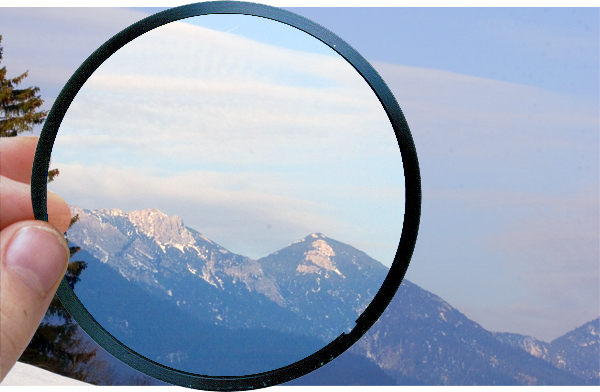
Filters used be used as a manual way of colour correction. The only lens used in recent times would primarily be the UV filters; these prevent UV from hitting the lens and obstructing the picture. Most cameras have UV filters built in however so the only use of Filters today would be to protect the lens and to make minor colour adjustments.
Filters used be used as a manual way of colour correction. The only lens used in recent times would primarily be the UV filters; these prevent UV from hitting the lens and obstructing the picture. Most cameras have UV filters built in however so the only use of Filters today would be to protect the lens and to make minor colour adjustments.
 |
Head Height
Head height is the distance of a subject's head from the top of the frame. It's usually considered poorly composed to have cropped part of the subjects head out of the picture on mid~wide shots. There should be enough room given to make it seem balanced but should never dip below or come close to the center of the picture.
Head height is the distance of a subject's head from the top of the frame. It's usually considered poorly composed to have cropped part of the subjects head out of the picture on mid~wide shots. There should be enough room given to make it seem balanced but should never dip below or come close to the center of the picture.
 |
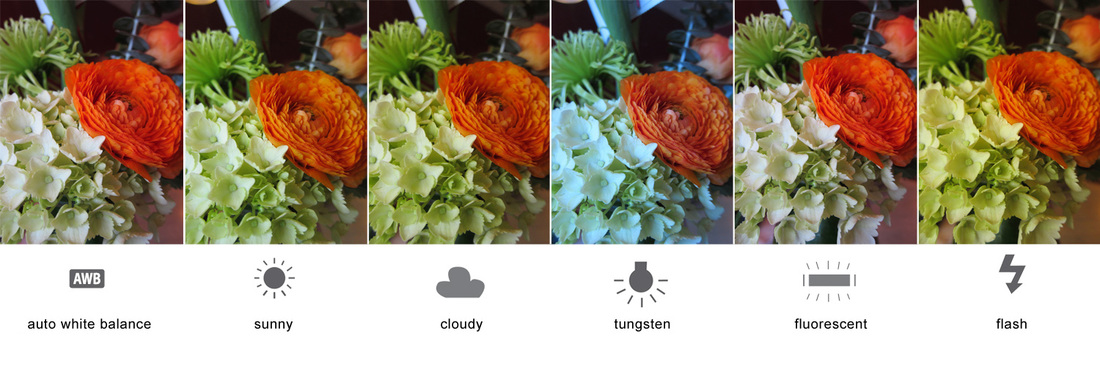
White Balance
White balance is the adjustment of colour balance to achieve a neutral and accurate result. White balance is measured in Kelvin (K).
Most cameras come with the following White Balance modes:
Auto - Camera automatically sets the white balance.
Daylight - Camera adds warm tones - 5200k
Cloudy - Camera adds warm tones - 6000k
Shade - Camera adds warm tones - 7000k
Tungsten - Camera adds cool tones - 3200k
Flouresecent - Camera adds warm (red) tones - 4000k
Flash - Camera adds warm tones - 6000k
Custom - Allows user to input custom Kelvin, useful when matching cameras.
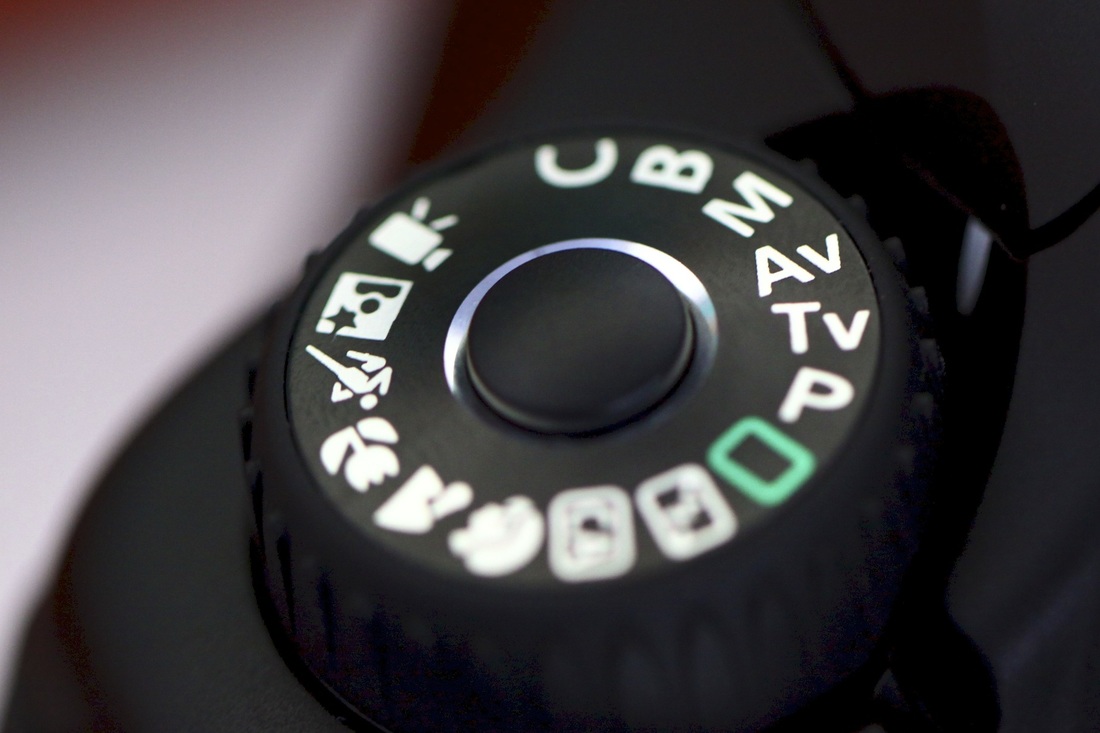
Camera Modes:
Camera modes give the photographer different settings to work with during a given situation. Photographers will normally work in Manual mode but for situations that require a fast setup they might opt for a priority mode to save time and ensure they get the shot.
The Canon 60D has the following camera modes:
P - Program Mode - This mode selects the aperture and shutter speed but enables you to cycle through different combinations of the two.
Tv - Shutter Priority - In this mode you select the shutter speed while the camera selects the aperture to suit the shot.
Av - Aperture Priority - In this mode you select the aperture while the camera selects the shutter speed to suit the shot.
M - Manual Exposure - Full control over all settings, must be inputted by the user without assistance.
B - Bulb - In this mode you control the exposure time by holding the shutter release button as long as you want it to last.
C - Custom Presets - Allows the user to create and use custom presets.
Full Auto - Fully Automatic, no control over settings, will use flash if necessary.
No Flash - Fully automatic, no control over settings, won't use flash.
CA - Creative Auto - Similar to Full Auto but allows you to change the depth of field and flash.
Portrait - Preset created to produce soft focused backgrounds and nice skin tones in the creation of portraits.
Landscape - Preset created to produce a picture with a great depth of field in the creation of landscape pictures.
Close-Up - Preset designed to create soft focused backgrounds.
Sports - Preset designed to use flash shutter speeds to capture moving subjects without blur.
Night Portrait - Similar to Portrait but with the use of flash and slow shutter speed.
Movie - Mode to use in the creation of video recording.
 |
Composition:
The word given to the arrangement or positioning of a subject within a photograph. One of the key parts to great photo is it's composition, which adds to the overall appeal to a photograph. The fibonacci spiral and rule of thirds are methods that are commonly applied when attempting to composition a shot.
The word given to the arrangement or positioning of a subject within a photograph. One of the key parts to great photo is it's composition, which adds to the overall appeal to a photograph. The fibonacci spiral and rule of thirds are methods that are commonly applied when attempting to composition a shot.


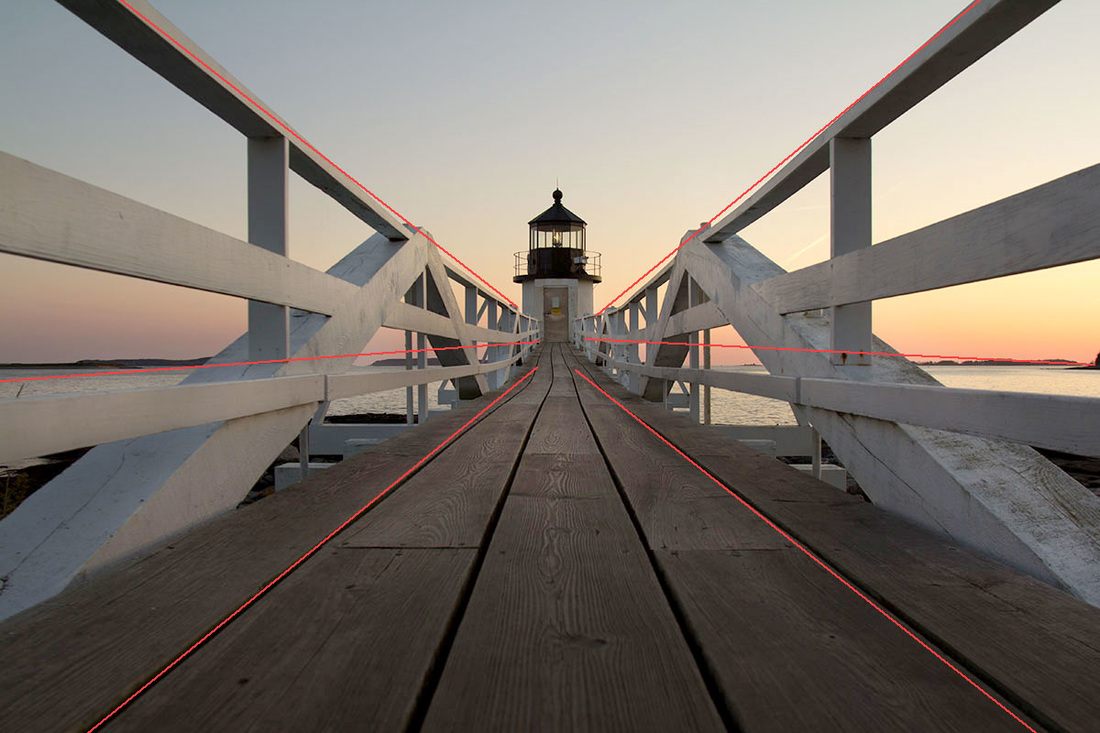
Perspective:
Perspective refers to the relative position, size, scale and space between objects in a photo. Depending on the positioning of the camera perspective can add various visual component to a photograph that wouldn't exist otherwise. In the example below the picture follows 'leading lines' which is suggestive to a viewer where their eyes should lead. It's balance and gradual adjustment in perspective makes it to be visually appealing image.
Perspective refers to the relative position, size, scale and space between objects in a photo. Depending on the positioning of the camera perspective can add various visual component to a photograph that wouldn't exist otherwise. In the example below the picture follows 'leading lines' which is suggestive to a viewer where their eyes should lead. It's balance and gradual adjustment in perspective makes it to be visually appealing image.
 |
Photoshop Techniques:
Dodging - A brush tool that lightens the subject by either its shadows, midtones or highlights.
Burning - A brush tool that darkens the subject by either its shadows, midtones or highlights.
Dodging - A brush tool that lightens the subject by either its shadows, midtones or highlights.
Burning - A brush tool that darkens the subject by either its shadows, midtones or highlights.
 |
Adjustments:
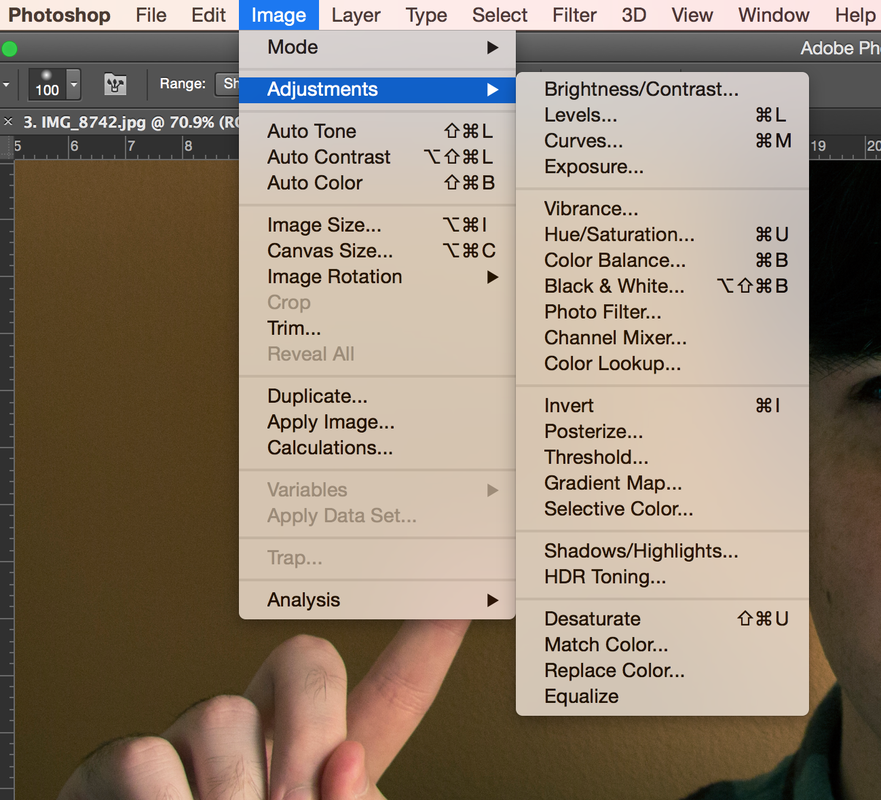 |
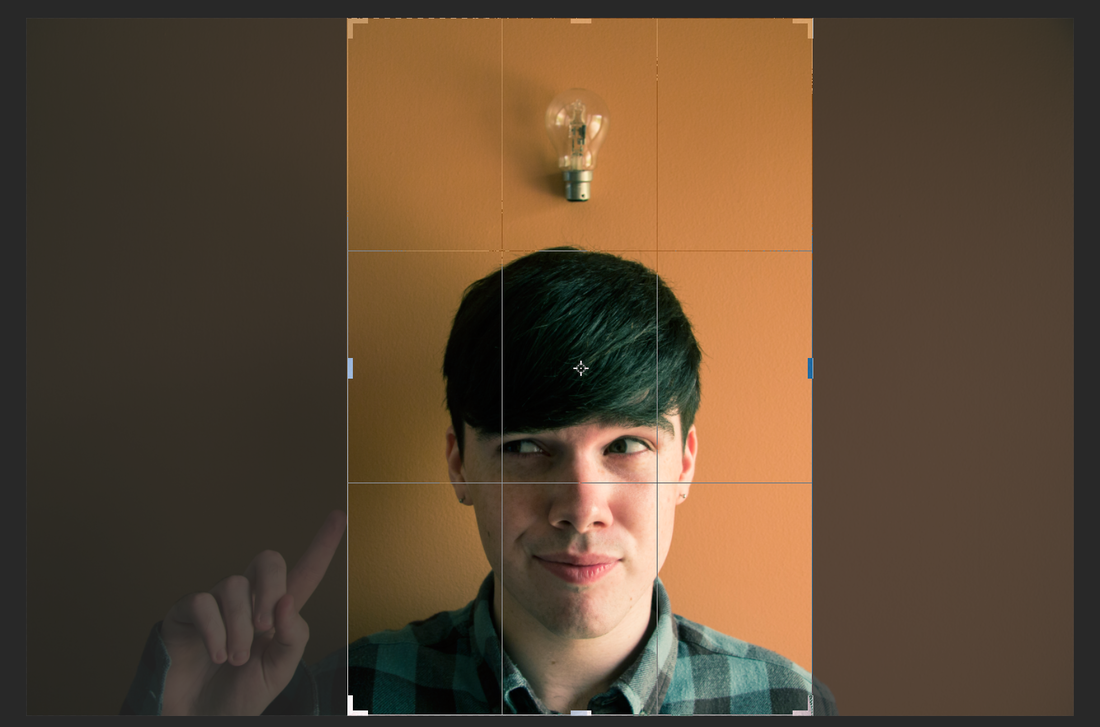
Cropping:
 |
Lasso - Freehand selection:
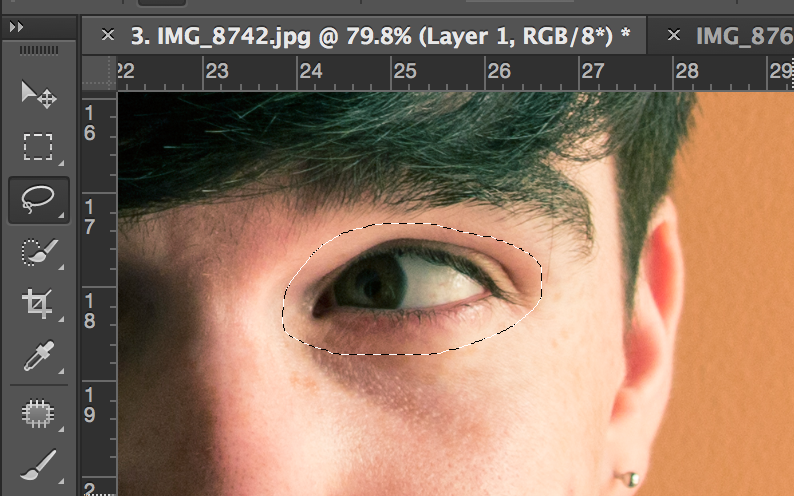 |
Unconventional Beauty:
During this assignment I spent one evening after college walking around Derry with the intention of letting inspiration find me. Overtime I've come across a few places that I thought would be great to photograph and I included these in my final pictures. I was particularly drawn to decrypt buildings and places of symmetry.
Picture 1:
Description: Dilapidated house with boarded up windows and molding exterior
Comment - I admire the pop of red from the door, rule of thirds applied and levelness while on a slope.
Picture 2:
Description: Narrow street view looking down a hill
Comment - I admire the contrast of the illuminated street to the surroundings, use of perspective and the solitary figure at the bottom of the hill.
Picture 3:
Description: Rundown building exterior
Comment - I admire the distinct contrast from making it black and white and the askew symmetry which reflects to the overall picture.
Picture 4:
Description: Bloody Sunday Wall
Comment - In this picture I wanted to use the distortion of my lens to the advantage of capturing the poster as well as the brick wall and tall metal fencing.
Picture 5:
Description: Weathered commercialism
Comment: I think this billboard reflects advertising in modern times for the way that it's all temporary and is normally forgotten about after a certain period of time. The way that they're stacked and torn reflects the way that advertisements try to out do each other.
Edges:
This assignment was taken over a few days in college and one day I came in during my day off. Following the same intention of the last assignment, I kept an open mind and went looking for places that jumped out at me or places that I have previously thought of. I wanted all my edges to be sharp and easily recognisable. I also wanted to use colour to help contrast these lines.
Picture 1:
Description: Industrial Derry
Comment: I took this at a great height in the Tower building of college. I appreciate the intense amount of sharp lines, the way that everything stands out on its own and the inclusion of the peace bridge.
Picture 2:
Description: Stairwell
Comment: I admire the pop of colour from the red railing and the ability to see it continuously looping on lower floors.
Picture 3:
Description: High wall fencing
Comment: I admire the seemingly split contrast of the sky and the wall. For me it resonates as being a reminder of the hardships Derry has faced.
Picture 4:
Description: Rooftop
Comment: What struck me about this was how the other attics were seemingly empty yet in this one there was sitting at the window. I like how the gutter extends right through the middle of the picture.
Picture 5:
Description: Stretch in perspective
Comment: I admire how the familiar same view of the side of the building compresses in width until it's unrecognisable.
Picture 6:
Description: Office Building
Comment: I've always been drawn to this building because of it's design and the pop of colours in the window. I took a picture of this building, composed the exact same way, on my phone and came back a few days later to recreate it with my DSLR.
The Big Picture:
This assignment was taken over the period of an hour in the TV studio, which was already booked for our photography class. I took inspiration for this shoot from a picture of Kendall Jenner, which was the most liked photo on instagram in 2015. I wanted to add my own spin on it by doing it full body and combining two different looks. I thought it was ambitious of me to do but it thankfully paid off by turning it how I imagined it.


12 People:
This assignment was taken over most of the assigned week. In this assignment I included photographs that I took for NWRC Records for their promotional campaign and behind the scenes pictures for my music video and Inglorious Basterds shoots. Each photo was taken carefully as I knew I only had one opportunity to get it right for the sake of the assignment.
Picture 1:
Description: Emer
Comment: I took inspiration from a picture of myself that was taken on the stairwell in year 1. Even though she is backlit I find that the light in the stairwell to be evenly dispersed and didn't encounter the problem of her being too dark.
Picture 2:
Description: Ronan
Comment: My original intention was to capture Ronan overlooking the scenic view however I spotted that his reflection was highly visible and opted to take a picture with that instead as I felt it would equate to a much more interesting photograph.
Picture 3:
Description: Music Student
Comment: Following the same intention of the previous picture, I walked around the subject scouting for the best angle to take the picture and I noticed his reflection in the monitor next to him.
Picture 4:
Description: Faustina
Comment: As Faustina is a media tutor I felt like the picture was best suited taken in front of the montage of movie posters in the newsroom. I changed the lighting by opening the blinds as a final decision before taking the picture.
Picture 5:
Description: Shannon
Comment: Extended family came to visit the Sunday of that week and my cousin was dressed in our favourite outfit. Her enthusiasm made me realise the opportunity I had to photograph her. I walked around the garden with her and settled with the idea of having her reaching for flowers. The garden this picture was taken in is secluded and the sunlight only hits a particular part of it meaning there would be good contrast between her and the background.
Picture 6:
Description: Elsa
Comment: Elsa was a hair and makeup artist on the Borderline music video. She completed the hair of one of the actors and was waiting on the other. I captured this shot naturally while she was thoughtful.
Picture 7:
Description: Clare
Comment: Clare was an actress on the Borderline music video and this was taken as evidence for the makeup artists. I appreciate the naturalness of her pose and the blue tones of the picture.
Picture 8:
Description: Ethán
Comment: This was taken while I was having a conversation with Ethán. I thought he was positioned in a relaxed and natural way. I took the photo candidly to not disturb his composure.
Picture 9:
Description: Music Student
Comment: This was taken for NWRC Records as evidence of work and for promotional purposes.
Picture 10:
Description: Michael
Comment: This was taken during our photography class following The Big Picture assignment. Michael was walking around the room taking test shots comparing two lenses and how their pictures differed. I thought the way he stood out against the light coming into the room would make for good pictures.
Picture 11:
Description: Aisling
Comment: This was taken when Aisling and I visited a friend at their house. Aisling was admiring a picture on the wall so I prepared my camera and caught her naturally realising I was about to take a picture.
Picture 12:
Description: Shannon
Comment: This was taken as we were preparing for a scene for one of the Inglourious Basterds pre-records.
Colours - Red
For this assignment we were instructed to take 25 pictures of a specific colour and I spent a full day capturing these photographs.
Picture 7:
Description: Coca Cola Truck
Comment: This was a passing instantaneous moment that was a frantic effort to take but I like the way that it remains sharp while the rest of the picture has some shutter blur.
Picture 17:
Description: "What's Stopping You From Getting On With Your Life?"
Comment: As I was passing this stand the center flyer really stood out to me so I applied a shallow depth of field and made that the focus and center of the picture.
Picture 21:
Description: Thirsty? Vending Machine
Comment: I wanted to frame "Thirsty?" with the Coca Cola sign in an isolated way to show the intended advertising.
Picture 22:
Description: Extended Perspective
Comment: I admire the matching leading lines seen in the roof and the floor as it shows great symmetry.
Picture 23:
Description: Aisling
Comment: I appreciate this photo for its rich and vibrant tones.
Creative Self Portraits
For this assignment over the course of 3 days. The first shoot was Picture 6 and I was inspired by the three wise monkeys, I used the studio during a lunch break to be out of the way of any classes.
Picture 1:
Description: Silhouette
Comment: I appreciate the natural framing that the door provided and how sharp the outline is.
Picture 2:
Description: Double Reality
Comment: For this picture I extended the inspiration from the first picture and then felt like I could get a picture outside replicating the silhouette version.
Picture 3:
Description: Idea
Comment: For this picture I originally wanted to use a reflective part of the bulb to distort the shape of my face however the reflective part was too small. Instead I used double sided tape and stuck it to the wall.
Picture 4:
Description: Different Views
Comment: I used the bottom of a vase to distort the picture.
Picture 5:
Description: Twins
Comment: I created a full sequence of images where I was leading up to the reflection disappearing however I decided that it would be better to just choose two images. For the bottom picture I posed for the picture, moved out of the frame and then took it again. I then stacked the two images in photoshop and erased my reflection.
Picture 6:
Description: Speak No Evil, See No Evil, Hear No Evil
Comment: I wanted to have a begrudging look so I placed two soft boxes on the floor and pointed them up at me.
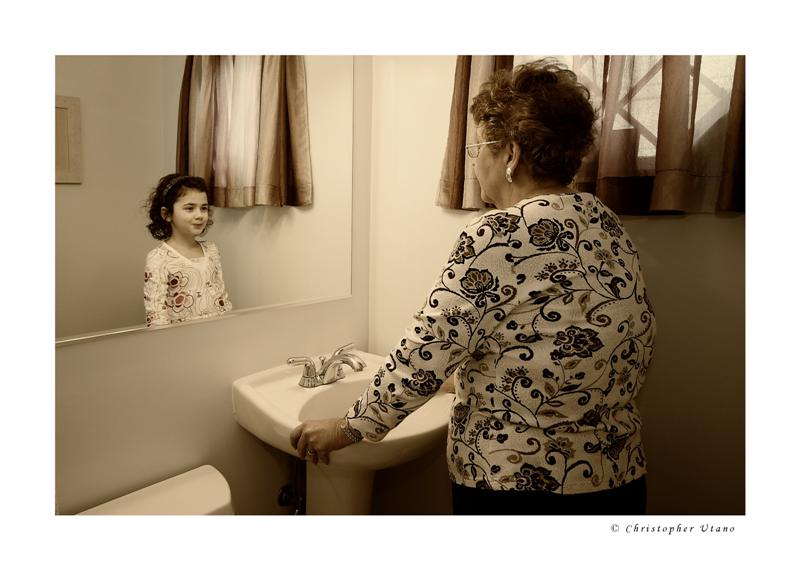
Final Project - Mirrors
I came across the idea of using a mirror when I was researching creative self portraits. I admired the way she used the mirror as a way of seeing through her instead of a reflective surface. I understood the process involved which helped me get through each of the shots quickly. I had to pose with the mirror in one photo and then take another picture with me out of the shot. I then stacked the two images in photoshop and erased the reflected mirror revealing the background behind me.
Description: Silhouette
Comment: I appreciate the natural framing that the door provided and how sharp the outline is.
Picture 2:
Description: Double Reality
Comment: For this picture I extended the inspiration from the first picture and then felt like I could get a picture outside replicating the silhouette version.
Picture 3:
Description: Idea
Comment: For this picture I originally wanted to use a reflective part of the bulb to distort the shape of my face however the reflective part was too small. Instead I used double sided tape and stuck it to the wall.
Picture 4:
Description: Different Views
Comment: I used the bottom of a vase to distort the picture.
Picture 5:
Description: Twins
Comment: I created a full sequence of images where I was leading up to the reflection disappearing however I decided that it would be better to just choose two images. For the bottom picture I posed for the picture, moved out of the frame and then took it again. I then stacked the two images in photoshop and erased my reflection.
Picture 6:
Description: Speak No Evil, See No Evil, Hear No Evil
Comment: I wanted to have a begrudging look so I placed two soft boxes on the floor and pointed them up at me.
Final Project - Mirrors
I came across the idea of using a mirror when I was researching creative self portraits. I admired the way she used the mirror as a way of seeing through her instead of a reflective surface. I understood the process involved which helped me get through each of the shots quickly. I had to pose with the mirror in one photo and then take another picture with me out of the shot. I then stacked the two images in photoshop and erased the reflected mirror revealing the background behind me.